|
|
|
||||||||||||||||||||||||


Forgotten Knowledge Quest
|
|
||||||||||||||||||||||||
| Recompensa: Acesso aos teleportes do Halls of Hope e poder de imbuir equipamentos no nível powerful. |
||||||||||||||||||||||||
| Localização: Black Sphinx Estate, Cosmic Chamber, Desecrated Glade, Formorgar Mines, Halls of Hope, Sacred Shaper Ruins e Temple Complex. |
||||||||||||||||||||||||
| Você enfrentará: Black Knight, Broken Shaper, Cave Parrot, Draken Spellweaver, Draken Warmaster, Diamond Servant Replica, Frost Dragon, Golden Servant Replica, Ice Golem, Ice Witch, Lizard Chosen, Lizard Legionnaire, Mutated Bat, Mutated Tiger, Necromancer, Orclops Doomhauler, Orclops Ravager, Shaper Matriarch, Twisted Shaper, Vile Grandmaster e Warlock. |
||||||||||||||||||||||||
| Mini-Bosses: Nenhum. |
||||||||||||||||||||||||
| Bosses: Dragonking Zyrtarch, Lady Tenebris, Lloyd, Frozen Horror, Thorn Knight, The Last Lore Keeper e The Time Guardian. |
||||||||||||||||||||||||
| Adicionado: Versão 11.02 (06 de dezembro de 2016) |
||||||||||||||||||||||||
|
||||||||||||||||||||||||
|
||||||||||||||||||||||||
Veja também: Quests.
Requerimentos
- 50 Pelvis Bones (para o portal de Death);
- 50 Marsh Stalker Feathers (para o portal de Energy);
- 50 Acorns (para o portal de Earth);
- The New Frontier Quest completa (para o portal de Fire);
- 01 Reinvigorating Seed;
- 50 Fish (para o portal de Ice);
- The Ice Islands Quest Formorgar Mines 1: The Mission completa (para o portal de Ice);
- 50 Incantation Notes (para o portal de Holy).
- Aconselhável time com 5 jogadores para matar os bosses;
- 450 Heavy Old Tomes (para mundos onde o templo não esteja construído);
Método
| Nota: Caso o seu servidor já tenha reconstruído o templo dos Astral Shapers, você só precisa entregar os 5 Heavy Old Tomes pra Albinius para liberar o uso da Imbuing Shrine e já pode iniciar as missões de cada portal. |
Acesso a Imbuing Shrine 
Para poder usar a máquina de imbuir, você deve entregar 5 Heavy Old Tomes para o NPC Albinius (aqui![]() ) dizendo hi, temple, yes.
) dizendo hi, temple, yes.
Entregando os tomos para Albinius
 |
Jogador: Hi
Albinius: Greetings, pilgrim. Welcome to the halls of hope. We are the keepers of this temple and welcome everyone willing to contribute. |
Okay, agora que você entregou os tomos, a sua missão será matar os 6 bosses dos portais para chegar no boss final. Cada boss que você matar irá liberar imbuements no nível powerful na máquina de imbuir.
|
|
|
 Construindo o Templo
A primeira tarefa deve ser feita por todo o servidor que será reconstruir o templo, que neste momento se encontra destruído. Essa tarefa tem 2 etapas e só precisa ser feita uma vez. O objetivo aqui será entregar 150 Heavy Old Tomes e depois mais 300 Heavy Old Tomes para Albinius, que se encontra no Halls of Hope, (aqui![]() ).
).
Você pode obter os tomes de 2 formas:
- Dropando de algumas criaturas como: Cyclops, Ghoul, Lost Gnome, Orc, Orc Cult Priest, Orc Shaman, Orc Spearman, Orc Warrior, Skeleton, Troll.
- Pegando em alguns baús espalhados por Thais. Os baús conhecidos são:
- Em uma casa na entrada de Greenshore, (aqui
 ).
). - No subsolo do Ancient Temple, (aqui).
- No segundo andar de uma casa a oeste da Undead Cave, (aqui).
- No subsolo de uma casa próxima do Mount Sternum, (aqui).
- Nas profundezas de uma caverna próxima do White Flower Temple, (aqui).
- Wiki greenshore.png
- Wikiancienttemple.PNG
- Wikimountsternum.PNG
- Wiki white flower temple.PNG
Após entregar todos os 450 tomos o templo será reconstruído e a quest poderá ser prosseguida. Após entregar mais 5 Heavy Old Tomes para o Albinius você poderá usar a Imbuing Shrine.
 Imbuements
| Obs: Todos os tipos de imbuements possuem determinadas categorias de equipamentos em que podem ser utilizados e há ainda imbuements que só podem ser utilizados em parte de uma determinada categoria de equipamentos como é o caso do imbuiment Swiftness que fornece aumento de velocidade, porém só pode ser utilizado em algumas botas. |
Ao matar os bosses dos portais dos Halls of Hope e usar as Abandoned Imbuing Shrines de cada boss, você liberará os seguintes imbuements no nível Powerful:
| Imbuements | |||||||
| Boss | Dano Elemental | Proteção Elemental | Aumento de Skill | Atributos Adicionais | |||
| Lady Tenebris | 
|
 Reap (Dano de Morte) |
 Lich Shroud (Proteção de Morte) |
-- |  Vampirism (Life Leech) | ||
| Lloyd | 
|
 Electrify (Dano de Energia) |
 Cloud Fabric (Proteção de Energia) |
 Swiftness (Aumento de Velocidade) |
-- | ||
| Thorn Knight | 
|
 Venom (Dano de Terra) |
 Snake Skin (Proteção de Terra) |
 Chop (Axe Skill) |
 Bash (Club Skill) |
 Slash (Sword Skill) |
-- |
| Dragonking Zyrtarch | 
|
 Scorch (Dano de Fogo) |
 Dragon Hide (Proteção de Fogo) |
-- |  Void (Mana Leech) | ||
| Frozen Horror | 
|
 Frost (Dano de Gelo) |
 Quara Scale (Proteção de Gelo) |
 Blockade (Aumento de Shielding) |
-- | ||
| The Time Guardian | 
|
-- |  Demon Presence (Proteção de Sagrado) |
 Precision (Aumento de Distance Skill) |
-- | ||
| The Last Lore Keeper | 
|
-- | -- |  Epiphany (Aumento de Magic Level) |
 Critical Hit (Critical Hit) | ||
| Veja Também: Imbuements |
|
|
|
|
 Astral Shaper Rune
Ao enfrentar cada boss da Forgotten Knowledge, você pode dropar uma das 06 partes da Astral Shaper Rune ![]() que serve para domar um Stone Rhino. Você pode obter Astral Shaper Rune entregando todas as 6 partes para o NPC Albinius.
que serve para domar um Stone Rhino. Você pode obter Astral Shaper Rune entregando todas as 6 partes para o NPC Albinius.
Partes da Runa |
||||||
| Nome | Atributos | Peso | Dropa de | |||
| Part of a Rune (Primeira) | 8.50 oz |
|
| Part of a Rune (Segunda) | 8.50 oz |
|
| Part of a Rune (Terceira) | 8.50 oz |
|
| Part of a Rune (Quarta) | 8.50 oz |
|
| Part of a Rune (Quinta) | 8.50 oz |
|
| Part of a Rune (Sexta) | 8.50 oz |
|
Falando com Albinius
|
Note que para entrar no local onde ficam os Stone Rhinos você precisa ter feito todos os bosses da quest (exceto o Last Lore Keeper).
Há chances do item se transformar em uma Inert Astral Shaper Rune ![]() ao usá-lo na criatura, se isso acontecer você deve deixá-la dentro de uma casa ou backpack por 20 horas para que volte a ficar ativa, porém dentro da backpack ela só se recarregará nos períodos em que o personagem estiver online.
ao usá-lo na criatura, se isso acontecer você deve deixá-la dentro de uma casa ou backpack por 20 horas para que volte a ficar ativa, porém dentro da backpack ela só se recarregará nos períodos em que o personagem estiver online.
Stone Rhino Mount
Montaria:

|
|
|
|
 Missões
Obs:
|
|
|
|
|
|
|
||||||||||||
|
|||||||||||||||||


Arquivo:Portal of Black Energy.gif Circle of the Black Sphinx Arquivo:Portal of Black Energy.gif
| Atenção: Após entrar na sala, você tem 15 minutos para matar a Lady Tenebris. |
Imbuements
Método
O primeiro portal é o de death, onde você enfrentará a boss Lady Tenebris. Para acessar esse portal apenas entregue 50 Pelvis Bones para Albinius dizendo "death portal" e "yes".
Pronto, após passar o portal você se encontrará no Black Sphinx Estate, uma mansão usada por uma antiga seita chamada "Black Sphinx", o seu objetivo principal aqui será matar a líder da seita, a Lady Tenebris. Mas para chegar até ela, você precisará pegar alguns itens.
Para começarmos, vá até o terceiro andar da mansão seguindo o mapa abaixo. Durante o caminho você irá enfrentar:
Broken Shapers, Liches, Necromancers, Renegade Knights, Shaper Matriarchs, Twisted Shapers, Undead Gladiators, Vicious Squires, Vile Grandmasters e durante o acesso, 01 Warlock.
Em seguida, suba a escada no círculo amarelo. Nesta pequena sala, você deverá usar o piso da ponta noroeste para obter a sua Ghostsilver Lantern, um artefato usado para revelar portas ocultas da mansão.
- Black Energy 1.png
- Black Energy2.png
- Black Energy 3.png
Libertando o Fantasma
Agora você precisará pegar a chave da porta. Volte pela escada e ainda no terceiro andar siga para leste até encontrar uma sala repleta de teias de aranha (no círculo azul no mapa abaixo). No centro da sala você encontrará a Old Desk, que é guardada por um fantasma. Use a mesa uma vez para receber uma Old Note do fantasma. Na nota, ele diz que precisa defender a chave a todo custo, mas que está disposto a te dar a chave se você ajudá-lo a encontrar a foto perdida de sua filha.
No mesmo andar, vá até a sala sudeste e você irá ver um Heap of Rubbish (pilha de lixo), dê use para obter um Painting of a Girl. Pronto, agora volte até o escritório e use a pintura na Old Desk, em seguida use a mesa novamente, ele irá pegar a foto e será libertado, deixando a Old Silver Key com você.
- Black Energy 4.png
Escritório no circulo azul.
- Black Energy 5.png
Ao sudeste do andar é possível encontrar o Painting of a Girl numa pilha de lixo.
Encontrando a Porta Escondida
Com os itens em mãos, agora você deve acender a sua Ghostsilver Lantern para poder ver a porta secreta. Caminhe até a sala nordeste desse andar e caminhe perto da parede norte para ver a porta, de use na porta e em seguida entre no teleport. Pronto, você estará em uma sala com 5 lugares e uma alavanca que te levará para o boss.
| Nota: Guarde a Ghostsilver Lantern para poder acessar o teleport no futuro. |
- Black Energy 8.png
Localização da porta secreta.
- Black Energy 9.png
Sala do teleporte para o boss.
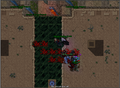
Lady Tenebris
Summons |
||||||
| Nome | HP | Exp | Charm | Dificuldade | Loot | |
| Shadow Fiend |  |
-- | -- |
|
| Shadow Tentacle |  |
-- | -- |
|
Boss |
||||||
| Nome | HP | Exp | Charm | Dificuldade | Loot | |
| Lady Tenebris |  |
-- | -- |
|
Estratégia:
Ao entrar na sala do boss, tome cuidado, pois haverão vários Shadow Tentacles. Mate-os o mais rápido possível, pois são eles que dão força para para a Lady Tenebris.
Após esse primeiro combate, ela ficará sumonando Shadow Fiend, eles não causam muito dano, porém, ficam atacando quem está á sua volta. Em certo momento, a Lady Tenebris irá puxar todos os membros para o meio da sala, fique atento pois ela pode dar um dano de até 2.500. Caso não consiga correr a tempo de escapar de seu ataque, recomenda-se equipar um Stone Skin Amulet e um Might Ring assim que ela puxar os membros do time para o meio da sala.
- Black Energy 10.png
Jogador com os tentáculos.
- Black Energy 11.png
Lady Tenebris com os jogadores no meio.
- Black Energy 12.png
Jogadores enfrentando a boss.
|
|
|
|
Arquivo:Portal of Violet Energy.gif Bane of the Cosmic Force Arquivo:Portal of Violet Energy.gif
| Atenção: Após entrar na sala, você tem 10 minutos para matar o Lloyd. |
Imbuements
Método
Ao entrar no Portal Violeta você estará na Cosmic Chamber, um templo secreto localizado abaixo de Trapwood. Para acessar esse portal, você deve entregar 50 Marsh Stalker Feathers para Albinius, diga hi - energy portal - yes e ele pegará os Marsh Stalker Feathers, após isso o portal será liberado.
Dentro da Cosmic Chamber você poderá encontrar duas possibilidades. Caso ninguém tenha ativado os mecanismos do lugar, ele estará repleto de Iron Servant Replicas, mas se o mecanismo estiver ativo, os Iron Servant Replicas serão acompanhados por Diamond Servant Replicas e Golden Servant Replicas. Para abrir o portal e ter acesso a sala do boss é necessário absorver energia de 05 Diamond Servant Replicas e 05 Golden Servant Replicas e para isso devemos encontrar duas alavancas que ficam em lados opostos ao norte do respawn.
O mecanismo ficará ativo por 10 minutos e depois disso os Diamond Servant Replicas e Golden Servant Replicas que ainda estiverem vivos irão desaparecer e para ativar o portal que leva ao boss novamente, será necessário repetir todo o processo.
- Alavanca Diamond.png
Alavanca Diamond que fica próximo a entrada no Ponto 01
- Alavanca Gold 2.png
Alavanca Gold que fica a lesta da entrada no Ponto 02
Caminho para o Portal
Feito isso devemos ir até o Portal do Boss que fica no centro do respawn. Note que existe um túnel a oeste da entrada que liga até um local próximo do Portal, assim poderá chegar mais rápido ao seu destino. Quando encontrar o Npc Mysterious Device siga ao norte e encontrará o Portal caso os mecanismos das alavancas estejam ativos e você tenha matado 05 Diamond Servant Replicas e 05 Golden Servant Replicas, caso contrário o Portal não estará lá.
- TS - Portal de Energy 2.png
Siga ao Norte para Encontrar o Portal
- Portal Lloyd.png
O Portal fica no Ponto Azul no centro do Mapa
- TS - Portal de Energy 3.png
Sala do Boss
Lloyd
Summons |
||||||
| Nome | HP | Exp | Charm | Dificuldade | Loot | |
| Cosmic Energy Prism A | -- | -- |
|
| Cosmic Energy Prism B | -- | -- |
|
| Cosmic Energy Prism C | -- | -- |
|
| Cosmic Energy Prism D | -- | -- |
|
Boss |
||||||
| Nome | HP | Exp | Charm | Dificuldade | Loot | |
| Lloyd |  |
-- | -- |
|
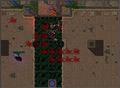
Estratégia:
Enfim chegou o momento de enfrentar Lloyd, o Guardião das Máquinas! Quando entrar na Sala do Boss, no meio dela haverá 04 "Cosmic Energy Prism". Cada uma das prismas representa uma vida de Lloyd, então será necessário destruir todas as "Cosmic Energy Prism" para que ele possa ser derrotado, tendo que matá-lo no total de cinco vezes. Cada vez que Lloyd for destruído, ele vai se teletransportar para o centro da sala em um local inacessível e uma das "Cosmic Energy Prism" vai ficar vulnerável por 10 segundos. Se ela não for destruída nessa tempo Lloyd vai descer dos pilares e as Cosmic Energy Prism  ficaram novamente invulneráveis. Então fique próximo delas assim que o Boss estiver perdendo uma de suas vidas e destrua elas na Ordem: A, B, C e D.
Em cada vida de Lloyd ele vai absorver uma das "Cosmic Energy Prism" e recuperar sua força e tendo destruído todas as 04 ele poderá ser derrotado.
ficaram novamente invulneráveis. Então fique próximo delas assim que o Boss estiver perdendo uma de suas vidas e destrua elas na Ordem: A, B, C e D.
Em cada vida de Lloyd ele vai absorver uma das "Cosmic Energy Prism" e recuperar sua força e tendo destruído todas as 04 ele poderá ser derrotado.

Todas as Cosmic Energy Prism estão invulneráveis
Cosmic Energy Prism A destruída
Cosmic Energy Prism B destruída
Cosmic Energy Prism C destruída
Cosmic Energy Prism D destruída e o Boss em sua última vida


|
|
|
|
Arquivo:Portal of Green Energy.gif The Desecrated Glade Arquivo:Portal of Green Energy.gif
| Atenção: Após entrar na sala, você tem 15 minutos para matar o Thorn Knight. |
Imbuements
Método
O terceiro portal é o de earth, onde você enfrentará o boss The Enraged Thorn Knight. Para acessar esse portal fale com Albinius dizendo "earth portal" e "yes", assim entregando 50 Acorns.
Pronto, após passar o portal você se encontrará em Outlaw Camp, (aqui![]() ), primeiro você tem que conversar com a NPC Weakened Forest Fury, que fica um pouco mais ao sudoeste, (aqui
), primeiro você tem que conversar com a NPC Weakened Forest Fury, que fica um pouco mais ao sudoeste, (aqui![]() ). Encontrando a NPC, fale hi - mission ou distress - yes.
). Encontrando a NPC, fale hi - mission ou distress - yes.
Ela contará para você que a floresta ficou enfraquecida por causa de alguns intrusos que queriam acabar com os segredos guardados na floresta. E pede a sua ajudar para fazer a floresta florescer novamente.
Neste momento, você tem duas tarefas, é recomendado que você esteja com o Empty Birdcage (dado pela NPC) e o Reinvigorating Seeds em mãos, pois assim você pode fazer as duas tarefas ao mesmo tempo. Você também precisará de um Phial of Fresh Water, que pode ser obtido usando a fonte ao lado da NPC. Feito tudo isso, use a fonte para entrar na Desecrated Glade. No caminho você irá encontrar: Orclops Ravagers e Orclops Doomhaulers.
- Green Energy 01.png
NPC e entrada da cave
Falando com a Weakened Forest Fury
 |
Jogador: hi
Weakened Forest Fury: I greet you, human. This is a time of distress, more than ever are we in need of guardians to protect us and our world. |
Libertando os Pássaros
Nesta primeira tarefa, a Weakened Forest Fury irá te dar uma Empty Birdcage, com ela em mãos, você deve usá-la nos Cave Parrots que podem ser encontrados no primeiro andar da caverna. Ao pegar o pássaro, a gaiola irá virar uma Occupied Birdcage. Após isso, você tem que liberar o pássaro próximo de uma árvore que se encontra no último andar da caverna (ver mapa abaixo). Você deve repetir esse processo 3 vezes.
| Dica: Se você conseguir outras duas Empty Birdcages com outro char ou com outros jogadores, você pode pegar os 3 pássaros e depois ir liberar todos juntos. |
- Green Energy 02.png
- Green Energy 05.png
Usando a gaiola na árvore.
- Green Energy 17.png
Mapa até a árvore.
Plantando as Árvores
Na segunda tarefa, você precisará plantar 5 árvores dentro da caverna. Para isso, você precisará de uma Reinvigorating Seeds, que pode ser dropada dos monstros encontrados na própria caverna, como do Orclops Doomhauler e do Orclops Ravager. E de um Phial of Fresh Water, que pode ser obtido ao usar a fonte na entrada da caverna.
Com os itens em mãos, você deve procurar por Fertile Soils, um piso de terra que está espalhado pela caverna. Primeiro, use a Reinvigorating Seeds no solo e após use o Phial of Fresh Water e uma grande árvore nascerá. Você deve repetir esse processo 5 vezes.
- Green Energy 06.png
Usando a semente no solo.
- Green Energy 07.png
Usando a água no solo.
Ao terminar os processos de libertar os pássaros e plantar as árvores, volte até a árvore central (no último andar) e use a água na árvore. Siga o mapa abaixo e se prepare, pois agora o seu objetivo será derrotar os intrusos da floresta, como o boss The Enraged Thorn Knight.
- Green Energy 08.png
Após usar a água na árvore.
- Green Energy 09.png
Siga até o círculo para chegar na sala com o teleport.
Thorn Knight
Summons |
||||||
| Nome | HP | Exp | Charm | Dificuldade | Loot | |
| Unbound Defiler |  |
-- | -- |
|
| Unbound Demon Outcast |  |
-- | -- |
|
| Unbound Demon |  |
-- | -- |
|
| Unbound Blightwalker |  |
-- | -- |
|
| Possessed Tree |  |
-- | -- |
|
| Thorn Minion |  |
-- | -- |
|
Boss |
||||||
| Nome | HP | Exp | Charm | Dificuldade | Loot | |
| Mounted Thorn Knight |  |
-- | -- |
|
| Thorn Steed |  |
-- | -- |
|
| The Shielded Thorn Knight |  |
-- | -- |
|
| The Enraged Thorn Knight |  |
-- | -- |
|
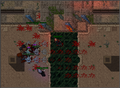
Estratégia:
| Atenção: Não utilize Sudden Death Rune em nenhuma das fases do boss, pois isso fará com que o mesmo se cure. |
Ao entrar na sala, terão várias Possessed Trees espalhadas. O primeiro objetivo do grupo aqui é matar elas, mas recomenda-se fazer isso uma por uma pois ao morrer, elas se transformam em criaturas mais fortes: Unbound Blightwalker, Unbound Defiler, Unbound Demon Outcast e Unbound Demon. Mate as transformações também. Essa etapa é importante porque ao matar as Possessed Tree, o boss principal ficará mais fraco.
Okay, feito a primeira parte, agora você irá derrotar o boss principal. O boss Mounted Thorn Knight tem três fases, a primeira fase ele está em uma montaria e fica sumonando Thorn Minions.
Assim que derrotá-lo, ele irá aparecer como The Shielded Thorn Knight junto a sua montaria Thorn Steed, aqui o grupo deve enfrentar primeiro a montaria e logo em sequencia o cavaleiro.
Finalmente chegamos no terceiro estágio, onde irá surgir o The Enraged Thorn Knight, dessa vez sem a montaria e mais fraco.
- Green Energy 12.png
Jogadores derrotando o Mounted Thorn Knight.
- Green Energy 13.png
Jogadores derrotando o The Shielded Thorn Knight.
- Green Energy 14.png
Jogadores derrotando o The Enraged Thorn Knight.
|
|
|
|
Arquivo:Portal of Orange Energy.gif The Unwary Mage Arquivo:Portal of Orange Energy.gif
| Atenção: Após entrar na sala, você tem 15 minutos para matar o Dragonking Zyrtarch. |
Imbuements
Método
| Atenção: Para essa missão é obrigatória a participação de pelo menos um Druid, e ele precisa ter a magia Utori Pox. Soulfire Runes também devem ser usadas pelas outras vocações. |
O quarto portal é o de fire, onde você enfrentará o boss Soul of Dragonking Zyrtarch. Para acessar esse portal finalize a The New Frontier Quest e fale hi - mission - father - yes - yes para Ivalisse. Ela contará que está preocupada com a ausência de seu pai Silus. Segundo seu relato, ele se juntou ao que chamou de "divisão de pesquisa especial", e foi se aventurar em Zao, acreditando que isso iria fazê-lo avançar em algo.
Falando com Ivalisse
|
Jogador: hi
Ivalisse: Hello, worshiper of the Astral Shapers! Welcome to the temple! While you are here to pay tribute, you can also learn something about the ancient art of imbuing. |
Após passar o portal você se encontrará em uma casa em Muggy Plains, do lado de fora da parede leste desta casa, existe uma escada para o telhado, suba e siga o único caminho até entrar no Temple Complex. Durante o caminho você irá enfrentar: Draken Spellweavers, Draken Warmasters, Lizard Chosens, Lizard Dragon Priests, Lizard High Guards, Lizard Legionnaires, Mutated Bats, Mutated Tigers.
- Orange Energy 01.png
Suba a escada e continue ao norte.
Encontrando o Cálice
Agora que você está no templo, a sua primeira tarefa será falar com o NPC A Strange Chalice (o pai de Ivalisse). Para encontrá-lo, siga o mapa abaixo.
- Orange Energy 02.png
Mapa até o cálice e até o salão.
- Orange Energy 03.png
- Orange Energy04.png
- Orange Energy 05.png
Entrada para o andar inferior.
- Orange Energy 06.png
Ao encontrar o Strange Chalice, fale hi - chalice - daughter - story - disguised - thirsty - learned.
No começo ele ficará bravo, mas logo depois irá revelar sua verdadeira identidade. Ele lhe contará que era o responsável por pesquisar sobre Zao e seus segredos, porém, Spectulus começou a persegui-lo e ele foi obrigado a ficar disfarçado. Ele também pedirá que diga a sua filha que ele a ama muito, porém não tem vontade de voltar pra casa até terminar suas pesquisas.
Falando com A Strange Chalice
 |
Jogador: hi
A Strange Chalice: Hi? What do you mean 'hi' - can't you see I am a... I have to lower my voice. Did it occur to you, that this 'chalice' does not want to be disturbed?! Leave me alone! Jogador: chalice Jogador: daughter Jogador: story Jogador: disguised Jogador: thirsty Jogador: learned |
Por último, ele contará algumas coisas que aprendeu ao ficar observando os Drakens, uma delas é a palavra chave que eles usam para entrar em um salão secreto. Agora, você precisará seguir até o circulo azul no mapa acima para chegar nesse salão, em seguida, seguir até a sala do mapa abaixo para derrotar o boss. Passando o teleport, você estará na sala com a alavanca.
- Orange Energy04.png
Mapa até o boss.
Dragonking Zyrtarch 
Summons |
||||||
| Nome | HP | Exp | Charm | Dificuldade | Loot | |
| Corrupted Soul |  |
-- | -- |
|
| Dragon Servant |  |
-- | -- |
|
| Soulcatcher |  |
-- | -- |
|
Boss |
||||||
| Nome | HP | Exp | Charm | Dificuldade | Loot | |
| Dragonking Zyrtarch |  |
-- | -- |
|
| Soul of Dragonking Zyrtarch |  |
-- | -- |
|
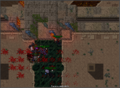
Estratégia:
Após o time passar o teleport, vocês estarão na sala com o Dragonking Zyrtarch (que é imune) e com 4 Soulcatchers (torres que não se movem). O primeiro passo aqui é o Druid do time atacar os Soulcatchers com a magia Utori Pox e o restante do time usar Soulfire Rune neles até que eles sumonem um total de 3 Corrupted Souls. Note que 2 Dragon Servants serão sumonados constantemente no meio da sala nesse processo.
| Dica: Enquanto o time fica cuidando dos Corrupted Souls ao sul, recomenda-se que o Knight e o Druid fiquem ao norte matando os Dragon Servants que nascerem. |
Assim que você tiver os 3 Corrupted Souls, lure eles para o centro da sala e mate um por vez. Mas atenção: vocês deverão matar todos no mesmo SQM. Conforme você for matando, eles vão virando um vórtex. O primeiro vórtex a aparecer será o verde ![]() , o segundo será roxo
, o segundo será roxo ![]() e o último será o vermelho
e o último será o vermelho ![]() .
.
Quando você conseguir o vórtex vermelho, todo o time deverá entrar e esperar que o knight lure o boss Dragonking Zyrtarch para dentro do vórtex. Quando todos estiverem dentro do vórtex, vocês estarão com a versão mortal do boss, o Soul of Dragonking Zyrtarch. Cuidado, pois ao entrarem no teleport haverá 2 Dragon Wraths.
Nesta sala, a melhor estratégia é os shooters utilizarem Fire Bomb ou Energy Bomb em uma área um pouco distante do centro da mesma, pois dessa forma ficarão a salvo dos Dragon Wraths que não passam por cima desses fields. Enquanto isso, o knight deverá manter o boss no meio juntamente com os 2 dragões. O time terá 30 segundos (a partir do momento em que o Dragonking entrar nesta sala) para ataca-lo. Passado o tempo, o time e o boss serão teleportados de volta a sala anterior e deverão repetir o processo até abrir o vórtex vermelho novamente.
| Aviso: Ao retornar para a primeira sala, leve o boss Dragonking Zyrtarch para longe das Soulcatcher, pois elas curam o boss. |
Assim que o boss morrer reporte sua missão para Ivalisse dizendo hi - father.
- Orange Energy 9.png
Neste local o boss é imune aos ataques.
- Orange Energy 10.png
Sala em que o boss se torna mortal.
Falando com Ivalisse
|
Jogador: hi
Ivalisse: Hello, worshiper of the Astral Shapers! Welcome to the temple! While you are here to pay tribute, you can also learn something about the ancient art of imbuing. |
|
|
|
|
Arquivo:Portal of Blue Energy.gif Dragon in Distress Arquivo:Portal of Blue Energy.gif
| Atenção: Após entrar na sala, você tem 15 minutos para matar o Frozen Horror. |
Imbuements
Método
Ao passar pelo portal azul, você sairá na Formorgar Mines, (aqui![]() ). Para acessar esse portal primeiro você terá que abrir a missão Formorgar Mines 1: The Mission da The Ice Islands Quest. Após isso entregue 50 Fish para Albinius dizendo "ice portal" e "yes". Para encontrar a NPC A Dragon Mother e começar a ajudá-la na missão Dragon in Distress basta seguir o mapa abaixo. No caminho você irá encontrar: Acolyte of the Cults, Adept of the Cults, Crystal Spiders, Frost Dragons, Ice Golems e Ice Witch.
). Para acessar esse portal primeiro você terá que abrir a missão Formorgar Mines 1: The Mission da The Ice Islands Quest. Após isso entregue 50 Fish para Albinius dizendo "ice portal" e "yes". Para encontrar a NPC A Dragon Mother e começar a ajudá-la na missão Dragon in Distress basta seguir o mapa abaixo. No caminho você irá encontrar: Acolyte of the Cults, Adept of the Cults, Crystal Spiders, Frost Dragons, Ice Golems e Ice Witch.
- Ice Energy 01.png
Mapa
- Ice Energy 02.png
Caminho para NPC
- Ice Energy 03.png
NPC
Chegando lá diga hi - help - assistance - yes ou simplesmente fale hi - mission. Nesse seu dia de sorte, ela conta que em outras épocas ela devoraria as criaturas de gelo que roubaram seu ovo, mas nas atuais circunstâncias, precisa de sua ajuda, sendo assim volte para os enormes corredores das minas e continue seu caminho até o teleport do boss.
Falando com A Dragon Mother
 |
Jogador: hi
A Dragon Mother: Greetings humans! Consider yourselfs lucky, I'm in need of help. |
Frozen Horror 
Summons |
||||||
| Nome | HP | Exp | Charm | Dificuldade | Loot | |
| Baby Dragon (Criatura) | .gif) |
-- | -- |
|
| Frozen Minion |  |
-- | -- |
|
| Icicle (Criatura) | .gif) |
-- | -- |
|
Boss |
||||||
| Nome | HP | Exp | Charm | Dificuldade | Loot | |
| Melting Frozen Horror |  |
-- | -- |
|
| Solid Frozen Horror |  |
-- | -- |
|
Estratégia:
Dicas:
|
Ao passar pelo teleport teremos uma tarefa bem difícil, ao norte você encontrará um ovo no meio de dois icicles.
A melhor estratégia é que enquanto os shooters aquecem o ovo usando magias e runas de Fogo, o Knight fique ao sul correndo com o Solid Frozen Horror de um lado para o outro, pois se o boss ficar perto do ovo, ele irá esfria-lo. O boss se tornará mortal (Melting Frozen Horror) por 20 segundos quando o ovo estiver com a vida verde, após isso o processo terá que ser repetido até o boss morrer.
Ao derrotá-lo, o ovo se chocará e se tornará um lindo e saudável Baby Dragon. Agora é só voltar para a Dragon Mother e reportar seu sucesso.
- Ice Energy 04.png
Jogadores healando o ovo
- Ice Energy 06.png
Enfrentando o boss
- Ice Energy 05.png
Após derrotar o boss e chocar o ovo
- Ice Energy 07.png
Entregando a missão
- Ice Energy 09.png
Usando a Abandoned Imbuing Shrine
Contente com o seu belo trabalho a NPC A Dragon Mother irá derreter um teleporte, (aqui![]() ) que estava bloqueado, liberando assim um local antes inacessível onde fica a Abandoned Imbuing Shrine.
) que estava bloqueado, liberando assim um local antes inacessível onde fica a Abandoned Imbuing Shrine.
Falando com A Dragon Mother
|
Jogador: hi
A Dragon Mother: You have done me a favour and the knowledge you are seeking shall be yours. I melted the ice for you, you can pass now. |
|
|
|
|
Arquivo:Portal of Golden Energy.gif Time is a Window Arquivo:Portal of Golden Energy.gif
| Atenção: Após entrar na sala, você tem 15 minutos para matar o Time Guardian. |
Imbuements
Método
| Atenção: Tenha em mente que ao usar a Time Machine, você terá passagem só de ida e só conseguirá sair do "passado" derrotando o The Time Guardian ou morrendo para ele. |
Ao passar pelo portal dourado você estará nas Sacred Shaper Ruins que ficam localizadas aos arredores das selvas de Banuta. Para acessar esse portal, entregue 50 Incantation Notes para Albinius falando "holy portal" e "yes", após isso o portal será liberado. Esteja preparado para enfrentar Twisted Shapers e Broken Shapers, que protegem uma preciosa máquina capaz de fazê-lo viajar pelo tempo! Se conseguir passar pelos desafios, esteja preparado para derrotar o The Time Guardian.
Criaturas |
||||||
| Nome | HP | Exp | Charm | Dificuldade | Loot | |
| Broken Shaper |  |
|
| Twisted Shaper |  |
|
Voltando no Tempo
- Holy6 - Mapa.png
Comece no Ponto Laranja e siga as Setas ate o Ponto Azul
- Holy9 - Máquina do Tempo.png
Suba sobre a Máquina do Tempo e puxe a Alavanca
- Holy8 - Passado.png
Siga as Setas até chegar ao Ponto Azul e entre no Teleport
- TS.png
Pegando o Imbuing Crystal
Após entrar na Máquina do Tempo, siga o caminho e entre no teleport, você estará em uma pequena sala onde terá uma Old Machine. Dê use nela para pegar um Imbuing Crystal, ele será utilizado depois. Para ir á sala das alavancas, basta entrar no teleport da esquerda, o da direita te leva á sala anterior.
The Time Guardian
Summons |
||||||
| Nome | HP | Exp | Charm | Dificuldade | Loot | |
| Lost Time | -- | -- |
|
| Time Waster | -- | -- |
|
Boss |
||||||
| Nome | HP | Exp | Charm | Dificuldade | Loot | |
| The Freezing Time Guardian |  |
-- | -- |
|
| The Blazing Time Guardian |  |
-- | -- |
|
| The Time Guardian |  |
-- | -- |
|
Estratégia:
Ao entrar no boss, ele ficará alternando entre três formas, sendo uma delas forte a todos danos elementais (use danos físicos), outra fraca a fogo e a última fraca a gelo.
Quando ele estiver na forma de The Time Guardian ele será forte contra todos os elementos (use danos físicos).
Na forma The Freezing Time Guardian  ele será fraco a fogo e quanto mais apanhar, mais ele irá sumonar Lost Times
 ![]() .
.
E por último, na forma The Blazing Time Guardian  , ele será fraco a gelo e quanto mais apanhar, mais ele irá sumonar Time Wasters
 ![]() .
.
Para conseguir matá-lo o time deverá observar as mudanças dele e atacar conforme os elementos respectivos. Também fique matando constantemente os Time Keepers que nascem na sala, pois isso irá ajudar a reduzir o dano no grupo de jogadores.
| Dica: Usar um Set de proteção contra Energy pode ser bem útil, já que praticamente todos os seus ataques são dessa natureza. |
A melhor estratégia é trapar o boss conforme imagem abaixo e deixar para bater no boss em sua fase de gelo, pois não tem problema ele sumonar os Lost Times, uma vez que eles não são imortais e é com o corpo deles que matamos os Time Wasters. Aconselhamos a somente os Knights e Paladins baterem na forma de fogo, e os mages deixem esse momento para matar os Time Keepers.
- Holy12.png
The Time Guardian
- Holy10.png
The Freezing Time Guardian
- Holy11.png
The Blazing Time Guardian
- Trap Time Guardian.png
Boss Trapado
- Holy13.png
Ao usar o corpo de um Lost Time em um Time Waster
- Holy14.png
Tenha o Imbuing Crystal em sua backpack
- Holy15.png
Usando a Abandoned Imbuing Shrine
|
|
|
|
 The Final Battle - The Last Lore Keeper
| Atenção: Após entrar na sala, você tem 17 minutos para matar o The Last Lore Keeper. |
Imbuements
Método
A passagem pelo energy gate só é liberada para quem matar todos os bosses dos outros portais. Após passar pelo portal você estará nas Astral Shaper Ruins (aqui![]() ), durante o percurso você encontrará vários Astral Shapers e Stone Rhinos, siga para o sul e desça (aqui
), durante o percurso você encontrará vários Astral Shapers e Stone Rhinos, siga para o sul e desça (aqui![]() ). Siga para oeste e desça (aqui
). Siga para oeste e desça (aqui![]() ) usando a magia Levitate, agora vá para leste e você irá encontrar uma Mystic Flame (aqui
) usando a magia Levitate, agora vá para leste e você irá encontrar uma Mystic Flame (aqui![]() ), passe por ela e você estará em uma sala com um único teleport que dá acesso a sala da alavanca. A tarefa final será matar o The Last Lore Keeper em um time de 15 pessoas.
), passe por ela e você estará em uma sala com um único teleport que dá acesso a sala da alavanca. A tarefa final será matar o The Last Lore Keeper em um time de 15 pessoas.
- Forgotten Knowledge The Lore Keeper 7-1.png
- Forgotten Knowledge The Lore Keeper 7-2.png
- Forgotten Knowledge The Lore Keeper 7-3.png
The Last Lore Keeper
Summons |
||||||
| Nome | HP | Exp | Charm | Dificuldade | Loot | |
| A Shielded Astral Glyph |  |
-- | -- |
|
| An Astral Glyph |  |
-- | -- |
|
| Animated Sword |  |
-- | -- |
|
| The Astral Source |  |
-- | -- |
|
| The Distorted Astral Source |  |
-- | -- |
|
Boss |
||||||
| Nome | HP | Exp | Charm | Dificuldade | Loot | |

Estratégia:
A sala do boss possui quatro vórtexes verdes ![]() em seus cantos que leva você a salas laterais menores e nelas há um teleport no sudeste que o traz de volta à sala do boss. A oeste dessa sala existe uma Abandoned Imbuing Shrine. Ao entrar na sala principal você verá a seguinte mensagem:
em seus cantos que leva você a salas laterais menores e nelas há um teleport no sudeste que o traz de volta à sala do boss. A oeste dessa sala existe uma Abandoned Imbuing Shrine. Ao entrar na sala principal você verá a seguinte mensagem:
"The Astral Glyph begins to draw upon bound astral power to expel you from the room!".
Seu time precisará se revezar para ir a essas salas laterais e matar o mini boss Bound Astral Power, assim vocês terão seu tempo de permanência na sala principal estendido. Quando mata-lo a seguinte mensagem aparecerá:
"The destruction of the power source gained you more time until the glyph is powered up!".
A equipe deve se organizar e separar 5 jogadores para ficarem exclusivamente renovando o tempo.
A sala principal tem, inicialmente, A Shielded Astral Glyph (imune a danos), The Astral Source e várias Animated Swords. O time deve atacar o The Astral Source até ele chegar ao red, assim ele se transformará no The Distorted Astral Source. Neste momento, o time precisa se dividir, uma parte deve continuar atacando o The Distorted Astral Source - para mantê-lo nesta forma - e os demais devem atacar o An Astral Glyph (versão mortal do A Shielded Astral Glyph).
Quando o An Astral Glyph torna-se imune novamente e vira o A Shielded Astral Glyph a seguinte mensagem aparece:
"Drawing upon the power of the source, the Glyph becomes shielded again!".
Depois de fazer esse processo várias vezes, o The Last Lore Keeper irá surgir, tenha mais cuidado pois o mesmo sumona diversas Sword Of Vengeances.

Aparição do The Distorted Astral Source.
Time matando The Last Lore Keeper.


|
|
|
|
Extras
Parabéns, você concluiu a quest!
Para conseguir outros imbuements: